Dalian Eastern Display Co., Ltd.
Dalian Eastern Display Co., Ltd.


Choosing the right color OLED display for your Arduino project can significantly enhance the user experience. This guide provides a comprehensive overview of factors to consider when selecting a display, covers different models, and offers practical tips for setup and integration. We'll examine key specifications, explore common applications, and address potential challenges, empowering you to make an informed decision based on your project's specific requirements.
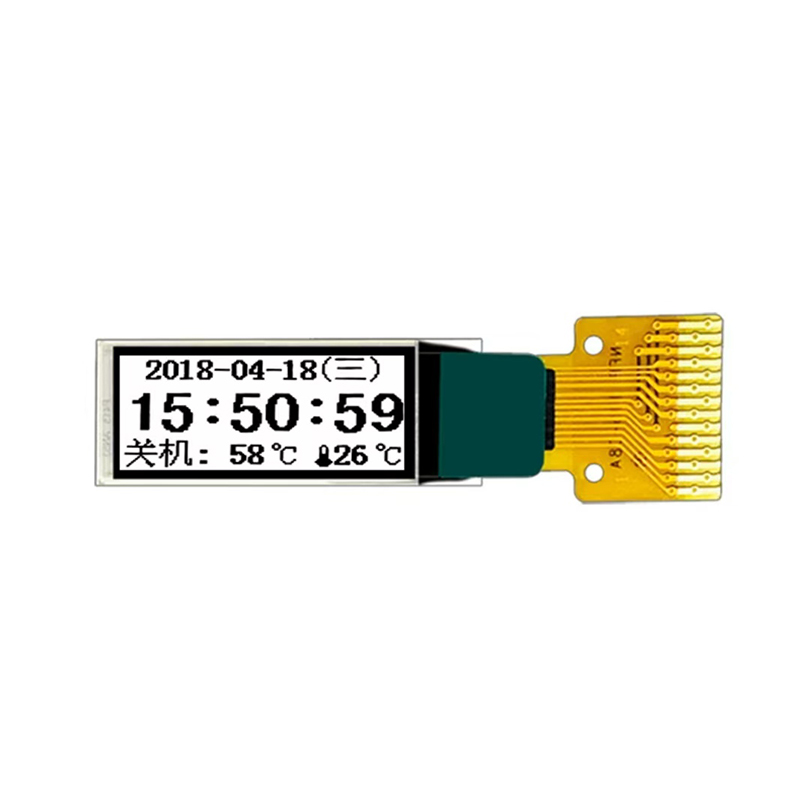
Organic Light-Emitting Diodes (OLEDs) are known for their vibrant colors, high contrast ratios, wide viewing angles, and fast response times. These characteristics make them ideal for Arduino projects requiring a visually appealing and responsive interface. Compared to traditional LCDs, OLEDs offer superior image quality and lower power consumption, making them suitable for portable or battery-powered applications. Arduino's versatility allows seamless integration with various OLED displays through different communication protocols such as I2C and SPI.
The ideal size and resolution depend heavily on your project's needs. Smaller displays (e.g., 0.96-inch) are suitable for compact devices, while larger displays (e.g., 2.4-inch or even larger) are better for projects needing more screen real estate. Higher resolutions provide sharper images, but come with increased complexity and potential memory requirements.
Most color OLED displays for Arduino use either I2C or SPI communication protocols. I2C is simpler to implement, requiring fewer pins, while SPI offers higher data transfer speeds. The choice depends on your Arduino's capabilities and the demands of your project. Many libraries support both interfaces, easing the integration process.
OLEDs generally consume less power than LCDs, especially when displaying static images. However, power consumption varies depending on the display's size, resolution, and brightness. Consider the power requirements of your project when selecting a display.
The market offers various color OLED displays compatible with Arduino. Researching specific models available through reputable distributors is crucial. Always check datasheets and example code provided by the manufacturer for compatibility and implementation details. Features such as built-in touchscreens can further enhance the user interface.
The setup process generally involves connecting the display to your Arduino board, installing the necessary libraries, and uploading the appropriate code. Detailed instructions are typically provided by the manufacturer or within the library documentation. Common tasks include configuring the display's address, initializing the communication protocol, and sending commands to display text or images.
Color OLED displays are used in a multitude of projects, including:
Troubleshooting typically involves checking connections, verifying library installations, and ensuring correct communication settings. Online forums and communities dedicated to Arduino offer valuable resources for resolving issues and finding solutions.
For high-quality LCD and OLED displays, consider exploring the range available at Dalian Eastern Display Co., Ltd. They offer a wide selection of displays suitable for various applications.
Remember to always consult the datasheets and documentation provided with your chosen display for specific instructions and compatibility information. This ensures successful integration into your Arduino project and achieves optimal performance.