Dalian Eastern Display Co., Ltd.
Dalian Eastern Display Co., Ltd.


This guide provides a detailed overview of Raspberry Pi OLED displays, covering their selection, setup, and application in various projects. We'll explore different display types, resolutions, and interfaces, along with practical examples and troubleshooting tips. Learn how to choose the right Raspberry Pi OLED display for your needs and get started with your project today.
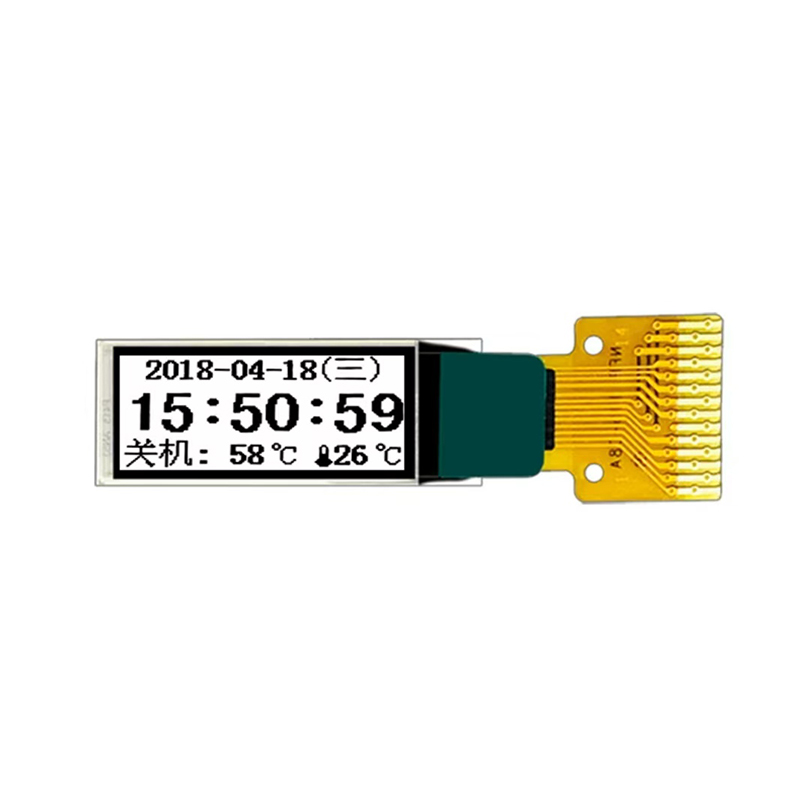
OLED (Organic Light-Emitting Diode) displays offer superior contrast, deeper blacks, and wider viewing angles compared to traditional LCDs. They are perfect for projects requiring vibrant visuals and low power consumption. When choosing a Raspberry Pi OLED display, consider factors like resolution, size, interface (I2C, SPI), and power requirements. Higher resolutions provide sharper images, but consume more power. I2C is generally simpler to implement than SPI.
Raspberry Pi OLED displays are available in a variety of sizes, ranging from small 0.96-inch displays to larger 2.4-inch or even 3.5-inch options. Resolution dictates the image clarity. A higher resolution, such as 128x64 or 240x128 pixels, provides a sharper image than a lower resolution display. The optimal size and resolution will depend on your specific project needs and available space.
Most Raspberry Pi OLED displays use either I2C or SPI communication protocols. I2C requires fewer GPIO pins on the Raspberry Pi and is generally easier to set up, making it a popular choice for beginners. SPI offers faster data transfer rates, making it suitable for applications requiring high-speed data updates. Consult the specifications of your chosen display to determine its interface.
Connect the Raspberry Pi OLED display to your Raspberry Pi using the appropriate wiring for the chosen interface (I2C or SPI). This usually involves connecting the display's power, ground, data, and clock (for SPI) or data and clock (for I2C) pins to the corresponding GPIO pins on the Raspberry Pi. Refer to your display's datasheet for precise pinouts and connection instructions.
You'll need to install the necessary libraries and drivers to control the Raspberry Pi OLED display. Popular Python libraries include `luma.oled` and `ssd1306`. These libraries provide simple functions to display text, images, and other graphical elements on the display. Specific installation instructions and examples will vary depending on the library and your chosen display. Ensure you have the correct driver for your display's controller chip (e.g., SSD1306, SH1106).
Use your Raspberry Pi OLED display to show real-time data from sensors, such as temperature, humidity, or pressure. This creates a compact and visually appealing data monitoring system. Several online tutorials offer code examples for integrating sensors and displays.
Build a custom dashboard to display information relevant to your project. This might include system statistics, network information, or data from a specific application. The flexible nature of Raspberry Pi OLED displays allows for creative customization.
Develop a simple game or interactive application using the display as the interface. The small size makes it ideal for portable or embedded gaming systems.
If you encounter problems, check your wiring, ensure the display's power supply is adequate, and verify that the correct libraries and drivers are installed and configured. Consult online forums and resources for assistance with specific error messages.
Raspberry Pi OLED displays offer a versatile and visually appealing way to enhance your Raspberry Pi projects. By understanding the different display options and following the setup instructions, you can easily integrate an OLED display into your next creation. Remember to consult the datasheets provided by the manufacturer for detailed specifications and technical information. For high-quality OLED displays, consider exploring options from Dalian Eastern Display Co., Ltd.