# Mastering the Round OLED Display with Arduino: A Comprehensive GuideThis guide provides a practical walkthrough on integrating a round OLED display with your Arduino projects, covering everything from hardware selection and wiring to coding examples and troubleshooting. Learn how to leverage the unique visual capabilities of round OLED displays for compelling user interfaces. We'll explore different display models, libraries, and techniques to help you achieve your project goals.
Integrating a round OLED display with an Arduino microcontroller opens up a world of possibilities for creating visually stunning and interactive projects. This comprehensive guide will walk you through the process, from selecting the right components to writing the code that brings your display to life. Whether you're a seasoned Arduino developer or just starting out, you'll find valuable insights and practical examples within.
Choosing Your Round OLED Display
Understanding OLED Technology
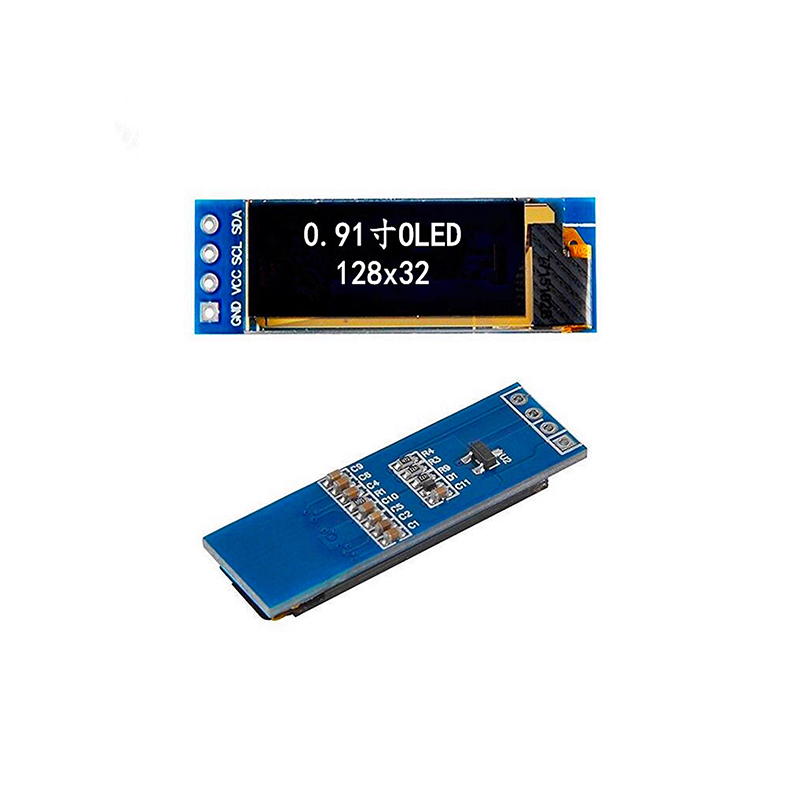
OLED (Organic Light-Emitting Diode) displays offer superior image quality compared to traditional LCDs. They provide vibrant colors, deep blacks, and wide viewing angles, making them ideal for projects requiring a high-quality visual experience. Round OLED displays add a unique aesthetic appeal, enhancing the overall design of your projects. Factors to consider when choosing include display size (commonly available in various diameters such as 0.96, 1.14, 1.3, and others), resolution, and interface type (I2C, SPI). Consider your project's requirements to select an appropriate display.
Popular Round OLED Display Models
Several manufacturers offer high-quality
round OLED displays compatible with Arduino. It's crucial to check the display's specifications carefully, including its resolution, power requirements, and communication interface (I2C or SPI) to ensure compatibility with your Arduino board. Research thoroughly before purchasing, reading user reviews and comparing features.
Wiring Your Round OLED Display to Arduino
Connecting the Display
This stage requires careful attention to detail. Incorrect wiring can damage your components. Consult the datasheet provided by your display manufacturer. Typical connections include VCC (power), GND (ground), SDA (I2C data), SCL (I2C clock), and optionally, a reset pin. Ensure that you connect the correct pins to avoid issues.
Using a Breadboard (Recommended for Beginners)
Beginners are encouraged to use a breadboard for prototyping. This allows for easy connection and disconnection of components, minimizing the risk of damage. Carefully study your chosen display's pinout diagram to ensure proper wiring on the breadboard.
Programming Your Arduino for Round OLED Display Control
Installing Necessary Libraries
You'll need a suitable library to control your
round OLED display. Popular libraries include Adafruit_GFX and Adafruit_SSD1306. Use the Arduino IDE's Library Manager to search for and install the library that is compatible with your specific display.
Basic Code Example (I2C)
Here's a simple example demonstrating how to display text on a
round OLED display using the I2C interface:cpp#include
#include #include #define SCREEN_WIDTH 128 // Adjust to your display's width#define SCREEN_HEIGHT 64 // Adjust to your display's height#define OLED_RESET 4 // Adjust to your OLED reset pinAdafruit_SSD1306 display(SCREEN_WIDTH, SCREEN_HEIGHT, &Wire, OLED_RESET);void setup() { Serial.begin(9600); display.begin(SSD1306_SWITCHCAPVCC, 0x3C); // Adjust address if needed display.clearDisplay(); display.setCursor(0, 0); display.println(Hello, World!); display.display();}void loop() { // Your code here}Remember to replace placeholders like `SCREEN_WIDTH`, `SCREEN_HEIGHT`, `OLED_RESET`, and the I2C address with values specific to your round OLED display. Consult your display's datasheet for the correct values.Advanced Techniques
Once comfortable with basic display functions, explore more advanced features like drawing graphics, images, and animations. Many examples and tutorials are available online to guide you.Troubleshooting
Common Issues and Solutions
Troubleshooting may involve checking connections, verifying library installation, confirming the correct I2C address, and checking power supply voltage. If problems persist, consult the display’s datasheet and online forums for assistance.Conclusion
Successfully integrating a round OLED display with your Arduino projects greatly enhances the user experience by presenting information in a visually appealing manner. By following the steps outlined in this guide, you can unlock the creative potential of these displays and create impressive projects. Remember to always consult the datasheets of your specific components for precise details and instructions. For high-quality OLED displays, consider exploring the options from reputable suppliers like Dalian Eastern Display Co., Ltd.